macOS management with Microsoft Intune
Deployment, single sign-on, settings, apps & DDM

Microsoft Intune now has built-in native controls so you can manage your Macs similar to how you manage Windows PCs across the device lifecycle, without third party integrations or extensions. This decreases complexity and overhead and increases security, to help achieve your Zero Trust goals.
Jeremy Chapman, Director of Microsoft 365, walks through the highlights:
- Automated device enrollment
- Microsoft Entra ID based single sign-on experience
- Extended configuration management controls
- Support for common DMG and PKG app package types
- Declarative Device Management (DDM) for updates
- Upcoming capabilities like Remote Help for macOS within the Intune Suite
Single Sign-On experience now for macOS.

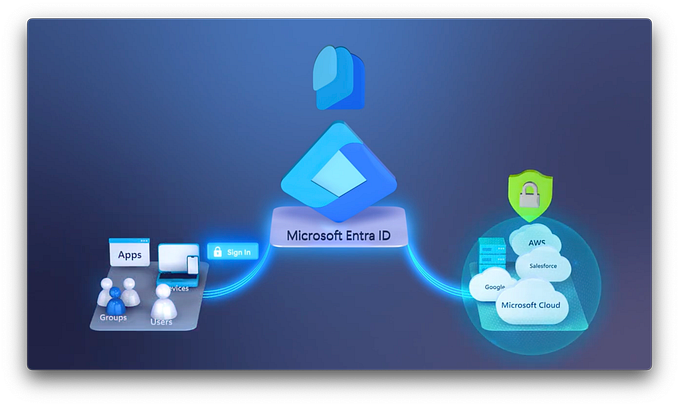
Seamless and secure access to apps and web services after sign-in. Check out how this works with Microsoft Entra ID.
Eliminate wait times for MDM policy pushes.

Microsoft Intune’s Declarative Device Management (DDM) autonomously updates macOS so software stays current and secure. Check it out.
No wrapping or modification needed.

Distribute DMG and PKG app packages with Microsoft Intune and go beyond what’s in the App Store. Start here.
Watch our video here:
QUICK LINKS:
00:00 — Manage your Macs similar to Windows PCs
01:12 — Admin configurations: Device Enrollment
03:16 — User experience for setup
05:50 — Device configuration for admins
07:13 — Declarative Device Management (DDM)
07:50 — Security settings
08:35 — Distribute and install DMG and PKG app packages
10:23 — Remote Help for macOS coming soon
10:54 — Wrap up
Link References
Get more information at https://aka.ms/IntuneforMac
Unfamiliar with Microsoft Mechanics?
As Microsoft’s official video series for IT, you can watch and share valuable content and demos of current and upcoming tech from the people who build it at Microsoft.
- Subscribe to our YouTube: https://www.youtube.com/c/MicrosoftMechanicsSeries
- Talk with other IT Pros, join us on the Microsoft Tech Community: https://techcommunity.microsoft.com/t5/microsoft-mechanics-blog/bg-p/MicrosoftMechanicsBlog
- Watch or listen from anywhere, subscribe to our podcast: https://microsoftmechanics.libsyn.com/podcast
Keep getting this insider knowledge, join us on social:
- Follow us on Twitter: https://twitter.com/MSFTMechanics
- Share knowledge on LinkedIn: https://www.linkedin.com/company/microsoft-mechanics/
- Enjoy us on Instagram: https://www.instagram.com/msftmechanics/
- Loosen up with us on TikTok: https://www.tiktok.com/@msftmechanics
Video Transcript:
-If you’re using additional tools to manage your Macs, well, now you don’t have to. Microsoft Intune now has built-in native controls so that you can comprehensively manage your Macs similar to how you manage your Windows PCs across the device lifecycle. And importantly, this is all without third-party integrations or extensions that you might be using right now, which means a lot less complexity and overhead, along with increased security across the board, as part of achieving your Zero Trust goals.
-In fact, I’ll walk you through some of the highlights from automated device enrollment into management to configure settings and install required apps, the new Entra-ID based single sign-on experience to apps and web services for seamless and secure access after sign-in, how we’ve extended configuration management controls to more settings, even day zero features as they are announced for more granular manageability, how we now support common DMG and PKG app package types, and can keep your Macs up-to-date using new Declarative Device Management, DDM, controls, and finally, how upcoming capabilities with the Intune Suite will work using Remote Help for macOS. Let me show you’d how to light up these configurations as an admin, as well as the experiences users will see on their Macs, and we’ll start with device enrollment.
-So, Intune supports both user-initiated enrollment using Intune’s company portal for manual enrollment, and automated device enrollment. This leverages Apple’s Business or School Manager to enroll devices in Intune to enforce required settings and install apps, with users just needing to authenticate on devices during setup.
-To get started, using public keys from Intune and Apple’s management infrastructure you can establish trust between both services. And from there you can manage your macOS devices directly from Intune. With the prerequisites in place, the management process starts by creating an enrollment profile using Intune.
-Here, I’m going to create a new profile and I will give it a name, Lab tech Mac enrollment. And you’ll see two options, either without user affinity for a shared or kiosk device, or with user affinity for a user-assigned device, I’ll choose that one. Next, you can decide how users will authenticate on their devices with Setup Assistant legacy or Setup Assistant with modern authentication.
-Now, the latter is the recommended option to support more secure multi-factor and passwordless authentication, so I’ll choose that. Now this is going to simplify the MFA experience, and also reduces password reuse, and also helps limit password reset support calls. Then, using the locked enrollment option, you can choose if users are allowed to delete the management profile or not. So, I’m going to opt for locked enrollment.
-From here, you can customize what users will see with a department name, so I’ll add one, and a phone number. Then, you can decide what screens you’d like to show or hide when users set up their device. So, I’ll use the toggle all button to hide everything. Then I can review and create. And now I have the basics in place for a simple device setup. Now, I’ve also configured a few required settings and apps that I’ll show you in a moment.
-But first, let me show you the user experience for setting up the Mac. And if you’re familiar with Autopilot deployment for Windows, this is a similar experience for macOS devices. So, when the device is turned on, the Apple Setup Assistant runs automatically. It starts with selecting a preferred language, then country or region, there we go.
-Next, I’ll choose the wi-fi network and I’ll input its password. At that point, the user is notified that the device will be enrolled into Remote Management. Next, they’ll need to input their Microsoft work or school account with username and then authenticate. This process is managed by Entra ID. And this account is set up for passwordless authentication.
-From there, you’ll create a local computer account as you normally would. And we’re working on removing this step, too, so that you can configure this in advance using Intune. At that point, the device enrollment into Intune starts. And when that completes, the device can be used with the required apps and settings you’ve configured.
-Next, with Intune’s Company Portal now on the device, it requests one more registration step, and once you sign in with a Microsoft work or school account, this will kick off Microsoft Entra join to link it with Intune. With that we’ve enabled Conditional Access and now even Single Sign On, or SSO for seamless access to services using an Entra ID account.
-So from now on, if the user logs out like you’re seeing right now, and logs back in, the device-level login will be valid for other Microsoft Work or School account apps and sites. For example, now when the user launches an app like Microsoft Word, it will populate their email and automatically authenticate. And this works across apps supporting Microsoft Authentication Libraries, or MSAL.
-So, Safari and Edge browsers, for example, both work with MSAL. So, when you launch Safari and go to microsoft365.com, and select sign in, with SSO enabled, you are taken right to your Microsoft 365 home page. Because of pre-existing policies, Intune in this case also installed a few required apps. Of course you can install others based on your own policies, and I’ll show you that in a moment.
-So next, with the device in a managed state, you can see the Company Portal and Microsoft Word apps were installed during initial enrollment. And as you assign additional apps via Intune, these will get installed automatically, even PKG and DMG packaged apps, like you are seeing here with Adobe Acrobat Reader and Visual Studio Code. Again, more on that in a second. So now that I’ve shown the device enrollment experience and a few of configurations you would notice as a user, let’s move on to the device configuration for admins.
-Much of what you saw can be configured prior to creating the enrollment profile: so, Under Devices, macOS in the Intune admin center, you’ll find Configuration Profiles. When you create a new profile, you’ll select the Profile Type and can choose from the Settings Catalog or Templates. Templates are nice because they contain groups of settings by functionality, and you can see here there are options to get started quickly.
-So now, if you have existing settings that you want to bring to Intune, you can use the Custom option in Templates to upload the XML settings files that you would have authored using the Apple Configurator or Profile Manager. In my case, I’m going to go back and use the settings catalog to create my profile. So, I’ll give it a name, and in the catalog itself, I can Add Settings.
-As I scroll down the categories on the right, you can see we have lots of granular settings to choose from. As you can see, you can get very specific with the native controls. So, if you’re used to things like Windows settings using ADMX-backed policies, you’ll notice a lot of similarities here. From there you can scope the profile to the devices and users that you want and create it.
-And as mentioned, when new settings are published by Apple, Intune will automatically reflect those. And before we leave configuration profiles, something brand new is Declarative Device Management, or DDM support for software updates, where instead of waiting for an MDM policy pushes, the local device can autonomously detect it needs an update, and proactively request it.
-Here’s a first look at an example of a Configuration Profile using Declarative Device Management to deliver an OS version update. And if we look at a managed Mac that scoped for this profile, you’ll see in device declarations that version 14 is required by the date that we set, and we can either stick to that date and that schedule or manually kick off the update.
-So, next let’s move on to Intune security settings. So here, enforcing macOS device compliance can ensure that the required security configurations are in place. And this is done using Compliance policies.
-For example, you can require that your managed devices have things like system integrity protection configured to gate access to your resources. You can require certain OS version and build levels. You can make password policy settings and set device encryption requirements, using File-Vault, Firewall and connection settings, as well as Gatekeeper controls to only allow app installation from defined locations. And if a device is found to be non-compliant, you can automatically notify the user via email, remotely lock the device or add it to the device retire list.
-At this point with your macOS devices fully configured along with policies for compliance, the next thing to take care of are the apps that you distribute to your managed devices. And this is another benefit of having a management agent for macOS, because Intune now goes beyond the App Store, as I mentioned, you can distribute and install standalone DMG and PKG app packages. Let me show you how that works.
-So, under Apps MacOS, when you add a new app, you can choose between Microsoft apps where packages are ready to go in the cloud, and you can also upload local native DMG and PKG files, no need to repackage or wrap them. In fact, here you can see a VS Code DMG package has already been added.
-And if you’re used to Windows management, DMG files are disk image files, like ISOs, and PKG files have additional installation options, kind of like MSI files work in Windows. So, I’m going to add another app here, a PKG file this time, and will confirm, and then navigate to my app package and hit OK. From there, I’ll enter Adobe as the publisher, and optionally you can add the category, like Productivity, and additional details that users will see in the Company Portal.
-So, I’ll select the minimum OS version, in my case, Monterey. And Intune will parse what you upload and list out any contained packages within the parent package. Then, in assignments, I can scope the users, or devices in this case, required to have this app.
-So, I’ll add my group, Lab Techs. Then I just need to review and create, and now my app will automatically install on machines in that group. So, Now up until this point, everything I’ve shown you in the Intune admin center and on the Mac are part of Microsoft 365 E3 and E5 to deploy new devices and keep existing ones compliant with the right settings and apps.
-That said, there’s even more that you can do by adding Intune Suite capabilities, which is continually evolving across managed platforms, for example, to help with end user support calls, something else coming soon for macOS as part of the Intune Suite add-on is Remote Help for macOS. What you’re seeing here is the initiation a helper would take to start a remote session with a user running macOS. Once they are connected, the helper can see what the user sees on their screen and help them remotely.
-So that was an overview of the built-in native controls that you can use to comprehensively manage your Macs, similar to how you manage your Windows PCs across the device lifecycle. To learn more, check out aka.ms/IntuneforMac. And keep watching Microsoft Mechanics for the latest updates. And thanks so much for watching!


